How to remove glare from a photo: when erasing works, by spot size
Short answer: a glare spot is a patch where the detail has been replaced by reflected light, so removing it means painting new detail in. Select the spot and its soft halo, then fill it. Whether that works depends mostly on the size of the spot.
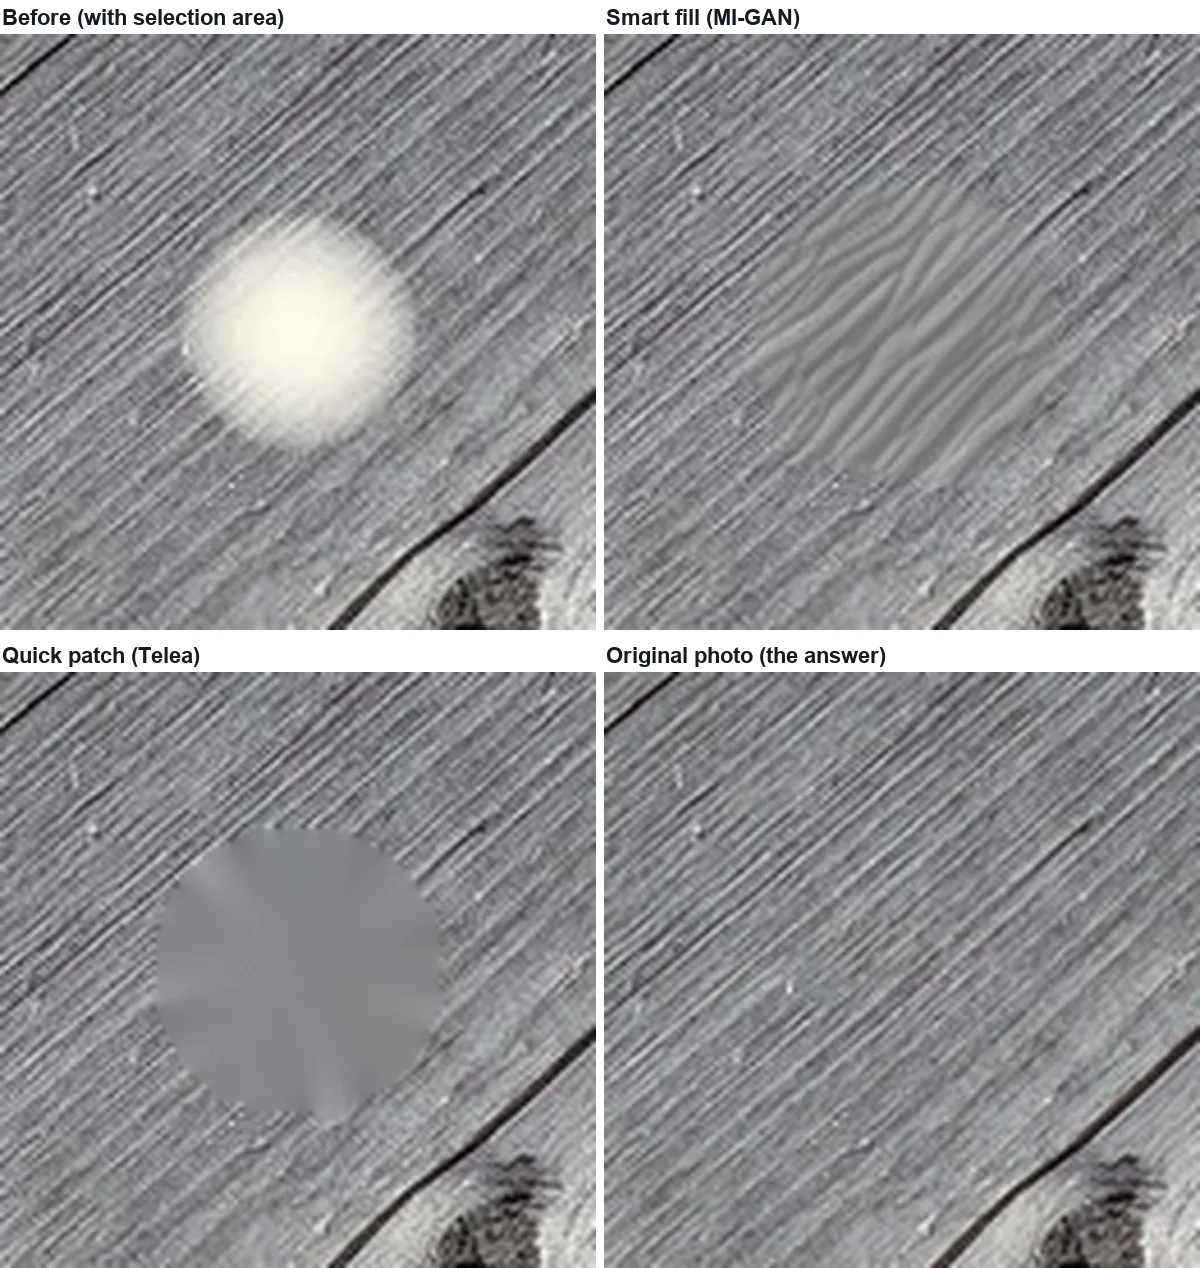
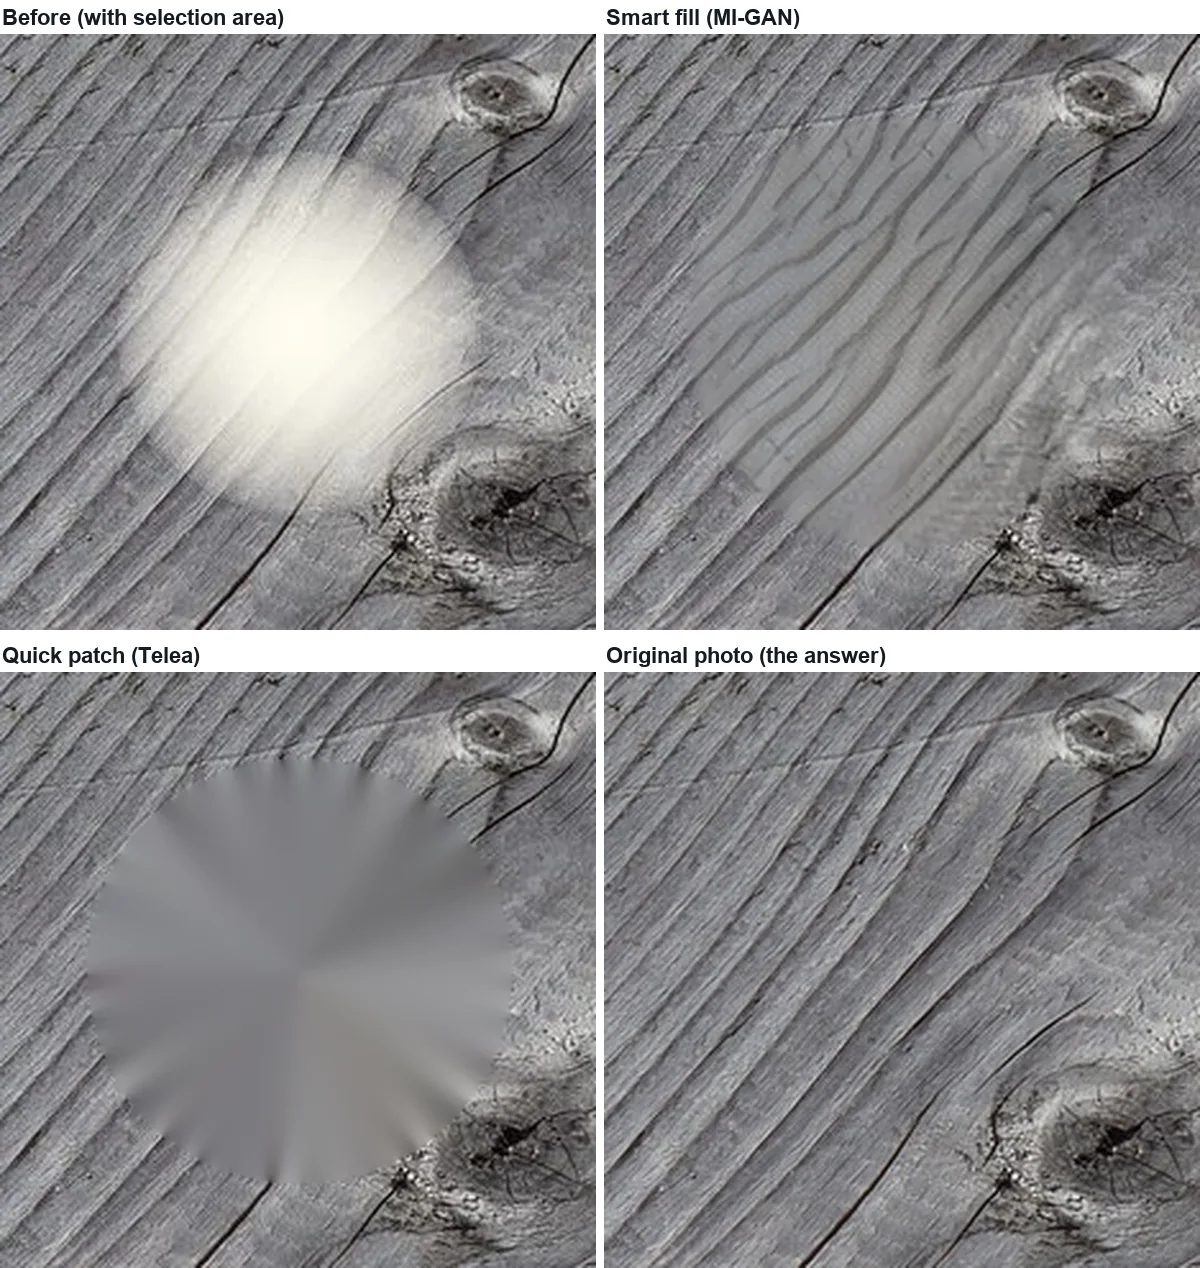
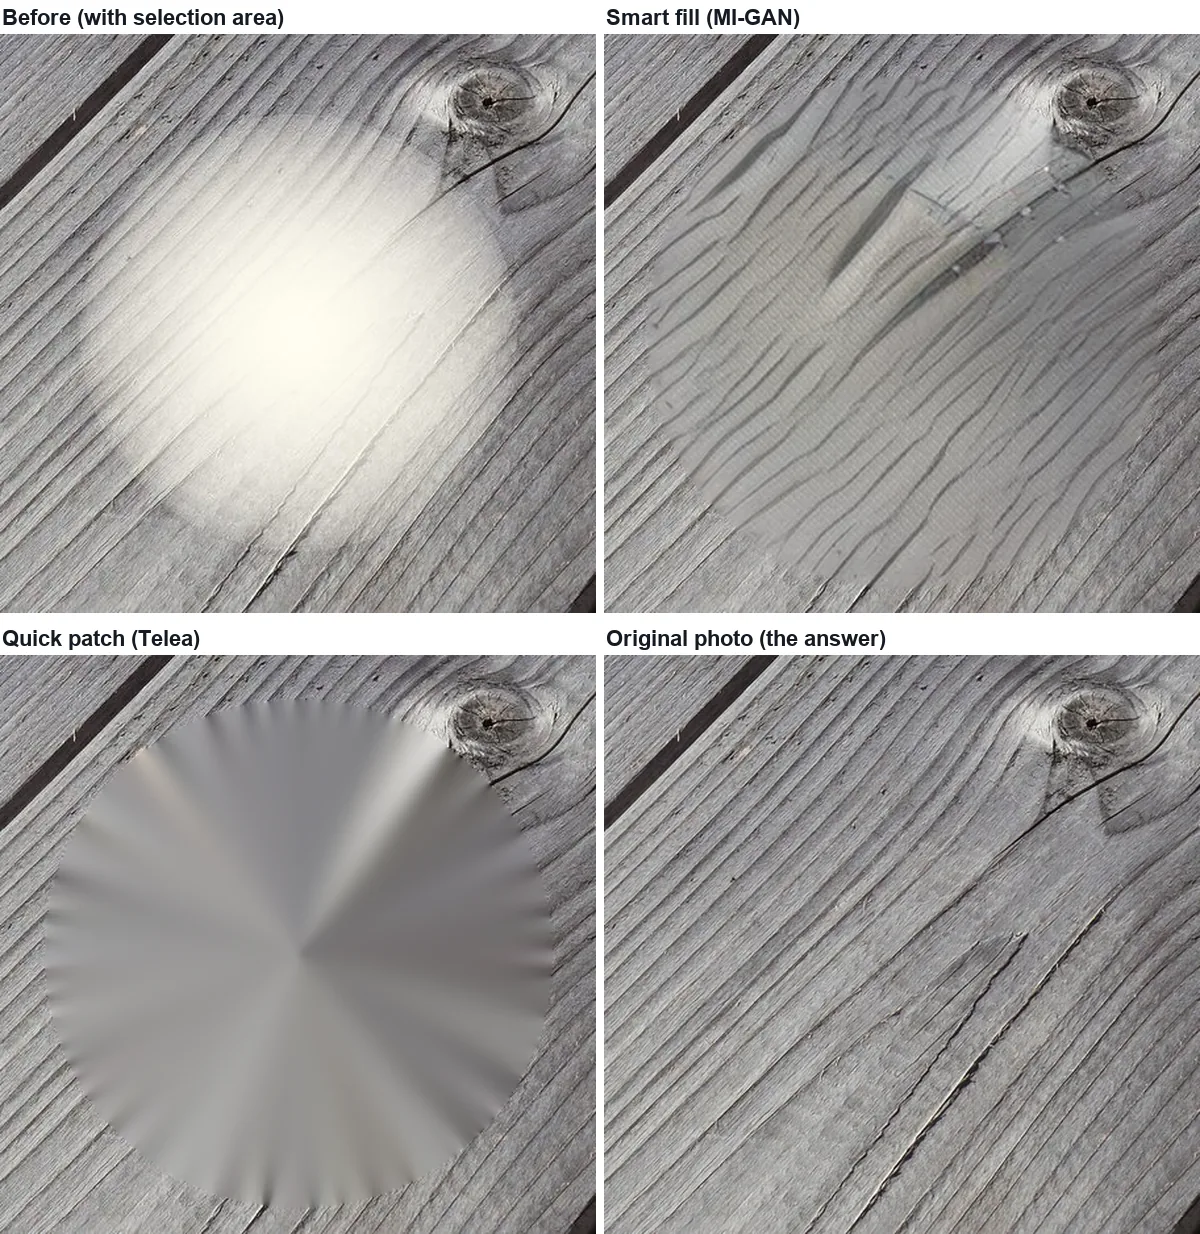
In our test on a wooden table, a small spot (0.25% of the frame) disappeared cleanly with the instant Quick patch; a medium spot (1.9%) needed Smart fill to keep the wood grain; a large spot (10.5%) came back as believable wood that was not the real wood. Above that size, and on eyes or text, reshoot instead.
"Glare" covers two different problems. A hot spot is a small area blown out to near-white: a flash in a varnished table, a lamp in a framed print, a reflection on a phone screen. A veil is a low-contrast haze over a large part of the image, such as a window reflection over a whole painting. Erasing helps with hot spots. A veil still contains the detail underneath and needs contrast and dehaze adjustments instead, which this guide does not cover.
The test: three hot spots on one photo
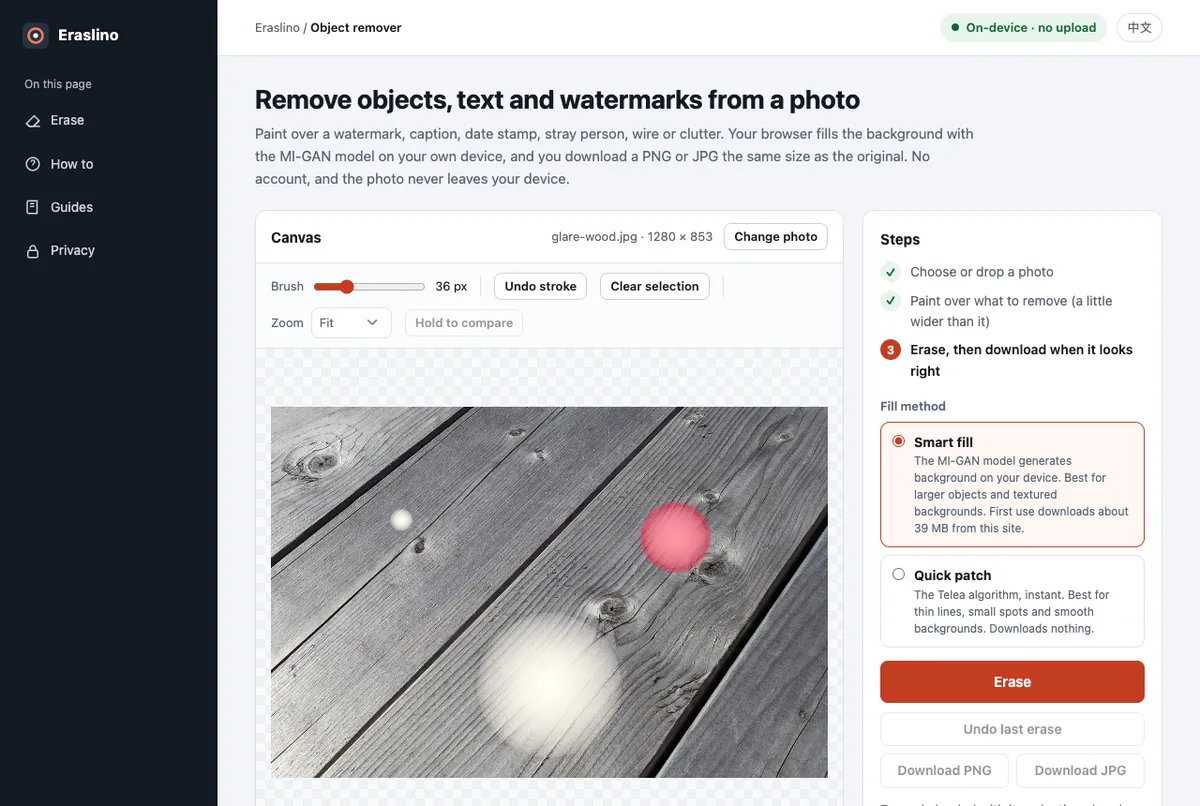
We drew three glare spots with a soft, near-white core onto a public-domain photo of a weathered table (1280 × 853), then erased each one separately. Because we added the glare, the untouched photo tells us what should be under it.
| Spot | Selected pixels | Share of photo | Glare left in | Smart fill | Quick patch | Detail (smart / quick) |
|---|---|---|---|---|---|---|
| Small (52 px across) | 2,694 | 0.25% | 57.5 | 19.4 | 16.0 | 0.52 / 0.03 |
| Medium (144 px) | 20,564 | 1.9% | 62.8 | 24.2 | 20.2 | 0.40 / 0.03 |
| Large (340 px) | 114,498 | 10.5% | 51.9 | 24.2 | 22.7 | 0.32 / 0.03 |
Error: average absolute difference from the original over the selection, 0–255, lower is closer. Detail: fine texture inside the selection relative to the original (1.00 = same). Each fill took 0.8 s (smart, model cached) or under 0.1 s (quick) in Chrome on an Apple M4 Pro.
What each size looks like
Decision table
| Situation | Do this | Why (from the test) |
|---|---|---|
| Small hot spot on any surface, or any spot on a plain surface | Quick patch | Lowest error on the small spot (16.0) and instant |
| Spot around 1–5% of the frame on a textured surface | Smart fill, then check edges with Hold to compare | Similar error, but only smart fill keeps texture (detail 0.40 vs 0.03) |
| Spot of 10% of the frame or more | Reshoot if you can; otherwise smart fill and accept invented detail | Error stays around 22–24 while the real crack in the wood disappears |
| Glare over eyes, faces, text or numbers | Reshoot | Any fill invents what is under it; an invented eye or digit is worse than glare |
| Hazy reflection over the whole picture | Contrast and dehaze, not erasing | The detail is still there; erasing would throw it away |
Glare on glasses
A reflection on spectacle lenses usually sits over the eyes, and that is where inpainting is least trustworthy: the model will draw an eye, but not that person's eye. If the reflection only covers the lens edge or the cheek, select just that part and use Smart fill. If it covers the iris, the honest fix is to reshoot: tilt the glasses slightly down or move the light higher or to the side, so the reflection leaves the lens.
Preventing glare when you can reshoot
- Move the light or the camera, not the object. A reflection leaves a shiny surface at the same angle the light arrives, so changing the angle between light, surface and lens by a few degrees moves the hot spot off the subject.
- Use a polarizing filter for water, glass and painted surfaces. Light reflected from a non-metallic surface is polarized, so a polarizer can cut it; the effect is strongest near Brewster's angle, given as about 56° from the vertical for common glass.
- Turn off the flash when photographing glossy prints, framed pictures or screens, and use window light from the side.
Sources
- Photo: Weatherworn top of wooden table, Wikimedia Commons, CC0 (read 2026-11-15). Glare spots added by us.
- Polarizers and Brewster's angle: Polarizing filter (photography), Wikipedia (read 2026-11-15).
- Measurements: our own, 2026-11-15, Eraslino build of that day in headless Chrome on an Apple M4 Pro. Method: guides page.

Keep going
- How to remove a shadow from a photo (and why erasing it is usually wrong) — A hard shadow on wood: erasing vs brightening by the measured ratio, and four common mistakes.
- AI object remover test: how big an object can you erase? — The same ball at four sizes on a lake: where the AI fill stops looking like the real scene.
- All guides — every test on one page.