How to remove a shadow from a photo (and why erasing it is usually wrong)
Short answer: to remove a shadow that falls across something you want to keep, brighten it, don't erase it. A shadow does not hide the surface; it only darkens it, so the detail is still there. In our test, brightening the shadow by the right amount brought the error down to 6.3 (0–255 scale), while erasing it with an AI fill made it 33.6, slightly worse than leaving the shadow alone (32.2).
Erase a shadow only when the object casting it is being erased too, or when the surface under it is plain enough that invented texture won't show.
Object removers are often advertised for shadows as well. The test below shows why that is usually the wrong tool, and four mistakes that make shadow fixes look fake.
The test
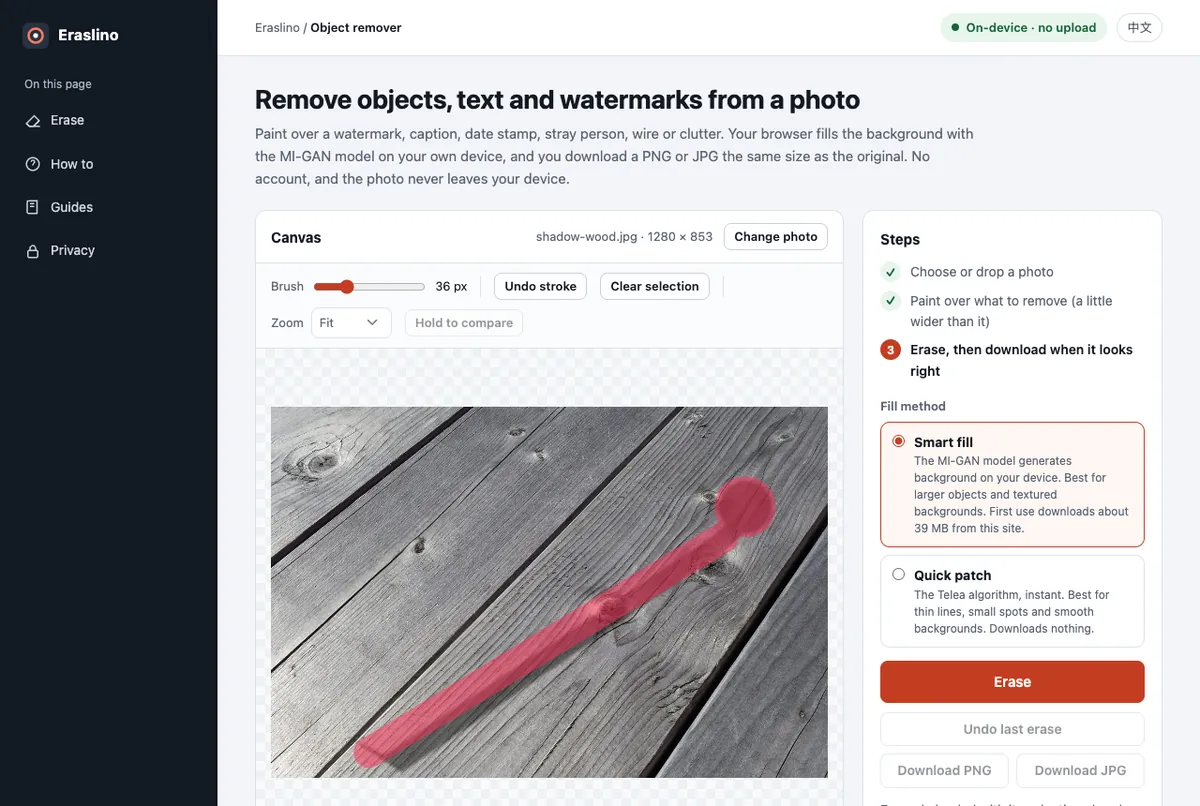
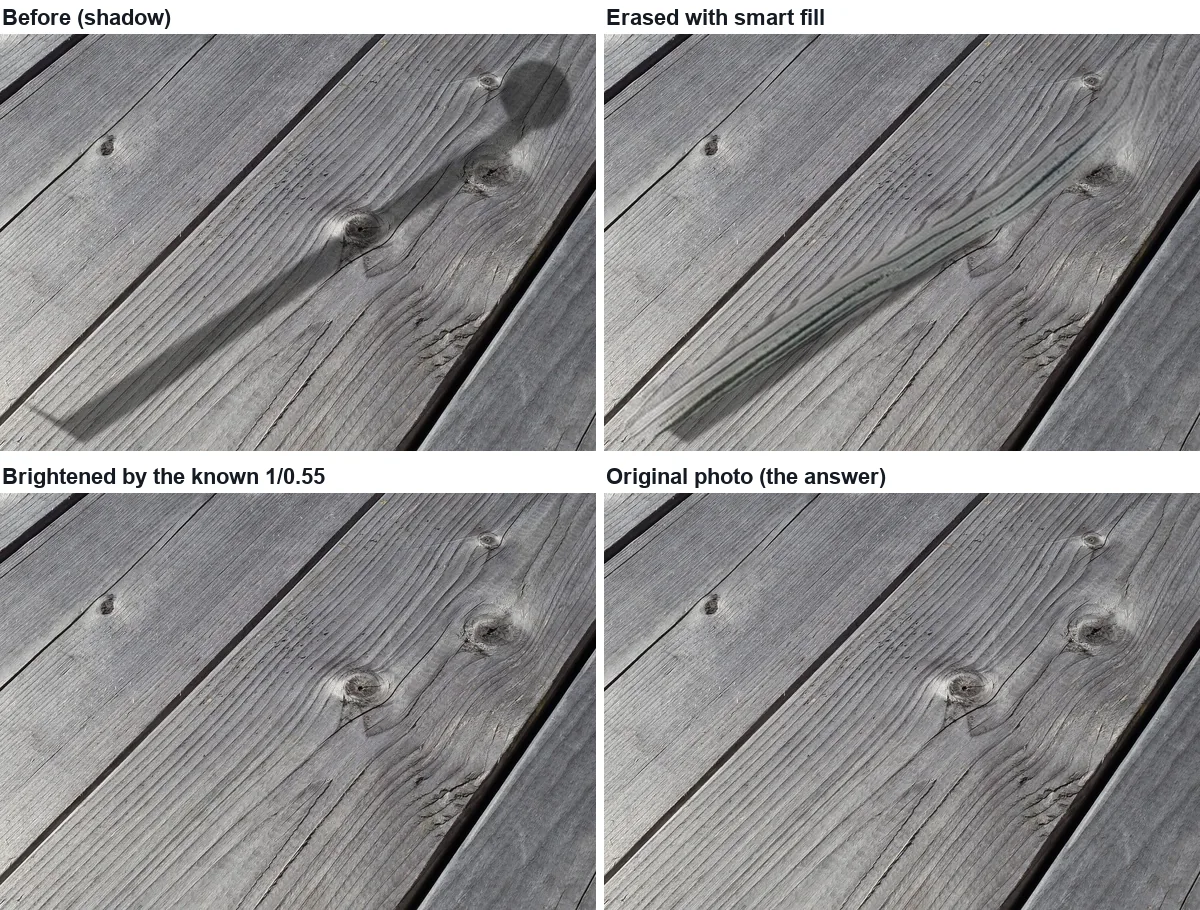
We cast a hard shadow, the kind a lamp post or a pole makes in sunlight, across a public-domain photo of a weathered table (1280 × 853). Inside the shadow every pixel is 55% as bright as the original, with a 3 px soft edge. We know the exact original, so we can score each fix.
| Fix | Error | Detail |
|---|---|---|
| Nothing (shadow left in) | 32.2 | — |
| Erase with Smart fill (MI-GAN) | 33.6 | 0.24 |
| Erase with Quick patch (Telea) | 35.2 | 0.03 |
| Brighten with a hard-edged selection, × 1/0.55 | 9.2 | — |
| Brighten following the soft edge, × 1/0.55 | 6.3 | — |
Error: average absolute difference from the original over the selection, lower is closer (86,418 pixels as the eraser selects them; the two brightening rows use our own drawing of the same strokes, 85,179 pixels). Detail: fine texture relative to the original (1.00 = same). Erasing took 0.9 s (smart, model cached) and 0.1 s (quick) in Chrome on an Apple M4 Pro; the brightening was computed by us from the same file.
Mistake 1: erasing a shadow instead of lifting it
Under a shadow the knots, cracks and grain are all still in the photo, just darker. An eraser deletes them and invents new ones, which is why both erase results scored worse than doing nothing. Brightening keeps every real detail; the residual error of 6.3 comes mostly from JPEG compression, which is amplified when dark pixels are scaled up.
Mistake 2: guessing the brightness instead of measuring it
The right factor is the ratio between the same material in light and in shadow. Pick a spot of the same surface just outside the shadow and one just inside it, read their brightness in any editor's colour picker, and divide. In our photo the shadow is 0.55 of the lit wood, so the shadow needs to be multiplied by 1 ÷ 0.55 ≈ 1.82 (an exposure increase of about 0.86 stop, since 20.86 ≈ 1.82). Eyeballing it usually leaves a light or dark ghost of the shadow behind.
Mistake 3: ignoring the soft edge
Real shadows have a penumbra, a band where they fade out. Brightening with a hard-edged selection over-brightens that band on one side and leaves a dark rim on the other: error 9.2 instead of 6.3 in our test, even with the exact factor. Feather the selection by about the width of the soft edge, or paint the adjustment with a soft brush.
Mistake 4: removing an object but keeping its shadow, or the reverse
If you erase a person or a sign, erase their shadow in the same selection, otherwise a shadow of nothing remains. In that case erasing is right, because the object is gone and there is nothing real to recover. See the object-size test for how large an area the fill can handle.
When erasing a shadow is the right call
- The object that cast it is being removed too.
- The shadow is small and on a plain surface (sky, a painted wall, a studio backdrop), where an invented surface looks the same as the real one.
- The shadow is so dark that it is clipped to black: then there is no detail left to recover, and brightening only brings up noise.
How to brighten a shadow
Eraslino only erases; it does not have an exposure brush. Any photo editor with a local adjustment does this: select the shadow, feather the selection by the width of its soft edge, and raise exposure by the measured amount (or use Levels/Curves to multiply the brightness by the ratio). Then use Eraslino only for what brightening cannot fix, such as a clipped core or the object that cast the shadow.
Sources
- Photo: Weatherworn top of wooden table, Wikimedia Commons, CC0 (read 2026-11-15). Shadow added by us (× 0.55, 3 px blur).
- Measurements: our own, 2026-11-15, Eraslino build of that day, headless Chrome on an Apple M4 Pro; brightening computed from the same files. Method: guides page.

Keep going
- How to remove glare from a photo: when erasing works, by spot size — Small, medium and large hot spots on wood: which fill to use and where erasing stops working.
- AI object remover test: how big an object can you erase? — The same ball at four sizes on a lake: where the AI fill stops looking like the real scene.
- All guides — every test on one page.